Gilded chocolate tiffin recipe

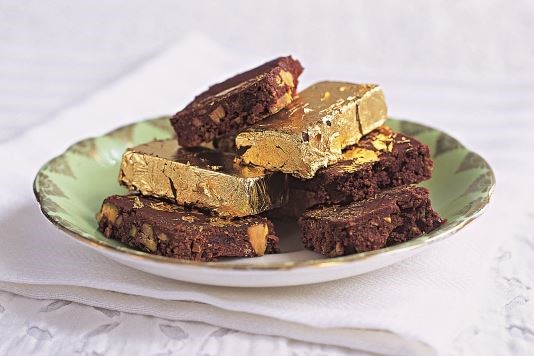
"Fruit and nut chocolate bars will never taste the same again after you try these! A cross between a delicious chocolate and a good biscuit, they can be served any time, but seem especially appropriate after dinner. The gold leaf adds luxury. I always make them at Christmas and they can be a very special gift, packed into a beautiful box."
Prep time includes 4 hours refrigerator rest period. Makes 36 squares.
Ingredients
- 100 g unsalted butter, diced, plus extra for the tin
- 80 g shelled, unsalted pistachios (or hazelnuts or pine nuts)
- 1 tbsp golden syrup
- 100 g 70% cocoa solids chocolate, broken into pieces
- 100 g plain biscuits (or even unsweetened cornflakes)
- 80 g dried sour cherries (or dried blueberries, cranberries, apricots or figs), finely chopped
- 3.5 oz unsalted butter, diced, plus extra for the tin
- 2.8 oz shelled, unsalted pistachios (or hazelnuts or pine nuts)
- 1 tbsp golden syrup
- 3.5 oz 70% cocoa solids chocolate, broken into pieces
- 3.5 oz plain biscuits (or even unsweetened cornflakes)
- 2.8 oz dried sour cherries (or dried blueberries, cranberries, apricots or figs), finely chopped
- 4 to 20 sheets of loose gold leaf, to taste and budget!
- 2 small paint brushes
- 4 to 20 sheets of loose gold leaf, to taste and budget!
- 2 small paint brushes
- 4 to 20 sheets of loose gold leaf, to taste and budget!
- 2 small paint brushes
Details
- Cuisine: British
- Recipe Type: Dessert
- Difficulty: Easy
- Preparation Time: 300 mins
- Cooking Time: 10 mins
- Serves: 8
Step-by-step
- Lightly butter a 20cm square tin or Swiss roll tin and line it with clingfilm; this will make it easier to remove the tiffin later.
- Preheat the oven to 170°C/fan 160°C/340°F/gas mark 3 1/2. Scatter the nuts on to a baking sheet and roast in the oven for about 5 minutes, shaking once and watching carefully to make sure they don’t burn, then remove and chop into chunks.
- Find a bowl that will fit over a pan of simmering water, making sure the base of the bowl does not touch the water. In the bowl, melt the butter, syrup and chocolate together. Place the biscuits in a large polythene bag, seal the top, then bash with a rolling pin until very finely crushed. Add the nuts, dried fruit and biscuits to the butter mixture and stir until all is very well blended.
- Spoon into the prepared tin and set in the refrigerator for at least 4 hours. Wait until the tiffin is set, then bring to room temperature to make it easier to cut (it might crack if too chilled). Cut into 3cm squares, wiping the knife with kitchen towel between slices.
- The gold leaf needs to be applied very carefully in a room with no draughts. Take 1 square of tiffin or nugget at a time on to a work surface. Place the gold booklet close by and slide off 1 sheet, by gently holding the top 2 corners with the tips of the 2 paint brushes, using both hands. Static will cause the bristles to grip the sheet. Try not to breathe on or touch the gold before it is on the tiffin!
- Loosely place the gold on a tiffin square, or wrap it around a nugget, then smooth it down with a paint brush. If it tears, it doesn’t matter, you can choose to patch it or leave it as it is with the chocolate showing through. You can either lay the gold randomly over the squares, leaving many of them plain, or wrap each nugget completely in gold. Store in the refrigerator... or maybe the safe!
Recipe taken from Bake & Decorate by Fiona Cairns (Quadrille, £12.99). Photography by Laura Hynd.
You might also like:
Comments
Be the first to comment
Do you want to comment on this article? You need to be signed in for this feature