Piña colada bread recipe

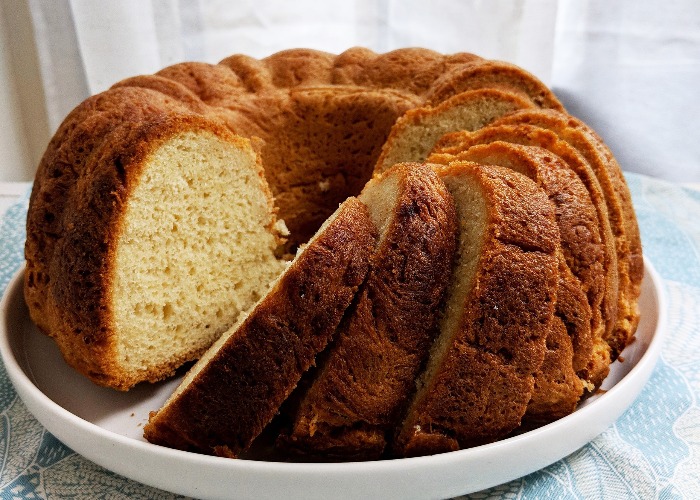
Pineapple chunks and coconut milk make this bread a ray of sunshine. This recipe makes a rather large loaf but any leftovers will make for a phenomenal bread and butter pudding.
Ingredients
- 2 tsp dried active yeast
- 1 x 400g/14oz tin of pineapple chunks, drained (retain the juice for another time)
- 500 ml coconut milk (or 1 x 400g/14oz tin of coconut milk plus 100ml/3.3floz water)
- 750 g self-raising flour, plus extra for dusting
- 3 tbsp butter or oil, for greasing
- 2 tsp dried active yeast
- 1 x 400g/14oz tin of pineapple chunks, drained (retain the juice for another time)
- 17.6 fl oz coconut milk (or 1 x 400g/14oz tin of coconut milk plus 100ml/3.3floz water)
- 26.5 oz self-raising flour, plus extra for dusting
- 3 tbsp butter or oil, for greasing
- 2 tsp dried active yeast
- 1 x 400g/14oz tin of pineapple chunks, drained (retain the juice for another time)
- 2.1 cups coconut milk (or 1 x 400g/14oz tin of coconut milk plus 100ml/3.3floz water)
- 26.5 oz self-raising flour, plus extra for dusting
- 3 tbsp butter or oil, for greasing
Details
- Cuisine: British
- Recipe Type: Bread
- Difficulty: Easy
- Preparation Time: 25 mins
- Cooking Time: 60 mins
- Serves: 16
Step-by-step
- First activate your yeast and give it a little warm bath to encourage it into life. Don’t make it too hot, though. The optimum temperature is somewhere around 40°C/104°F, or just comfortably warm. Too hot and you’ll kill off the yeast which means your bread will sulk and refuse to rise. Pop it into a small cup with 50ml/1.6floz of warm water, and leave it for a few minutes to start to bubble and grow.
- In the meantime, blitz the pineapple chunks and coconut milk in a blender. This step is not strictly essential: if you don’t have a blender, you can use the pineapple chunks whole. It makes for a different result but still a deliciously pleasant one.
- However you use it, tip the coconut milk and pineapple into a large mixing bowl.
- Add half the flour and the warm yeast mixture. Mix swiftly but firmly to form a batter.
- Gradually incorporate the remaining flour into the mixture, a large heaped spoonful at a time, until a dough is formed. A non-serrated butter knife is the best implement to bring a dough together, as it doesn’t stick awkwardly to any edges. If you don’t have one, the well-oiled handle of a clean wooden spoon works just as well.
- When you have a soft, squashy dough, heavily flour your worktop and tip the dough carefully onto it. Knead it for around 5 minutes, pushing it away from you with the palm of your hand, then folding it in half, giving it a quarter turn, and repeating, getting faster as you gain a little confidence with it. You should feel a change in the texture of the dough as you knead it. It will become springy and slightly buoyant to touch – this is when you need to stop and leave it alone.
- Scoop it back into the mixing bowl and cover with cling film or a loose plastic bag with the handles tucked beneath the bowl so no air can escape and dry out the dough.
- Leave it to rise for 2 hours in a warm place, or 3 in a not-so-warm one. If your kitchen is generally cold, wrap the base of the bowl in a thick towel or fluffy dressing gown to snuggle it and get it going.
- When risen, the dough should be doubled in size. Shape it into a round or a log, pop it on a greased baking tray or into a large, greased cake tin (a 1-litre/34floz bundt tin or 900g/2lb loaf tin would be great). Leave it for another hour to prove – that’s a second rise.
- Preheat your oven to 170°C/320°F/gas mark 3 about 10 minutes before the proving hour is up, and make sure there is a shelf positioned just below the middle of the oven.
- Pop the bread in for 1 hour, until risen and golden. Remove from the tray or tip out of the tin and allow to cool on a wire rack.
- Enjoy warm or cool. Store leftovers in an airtight bag or container for up to 3 days, or in the freezer, in slices, for up to 6 months.
This recipe is from Tin Can Cook by Jack Monroe. Published by Bluebird, £6.99. Photography by Jack Monroe.
You might also like:
Sicilian lemon and orange sweet bread
Comments
Be the first to comment
Do you want to comment on this article? You need to be signed in for this feature