Paul Hollywood's bloomer recipe
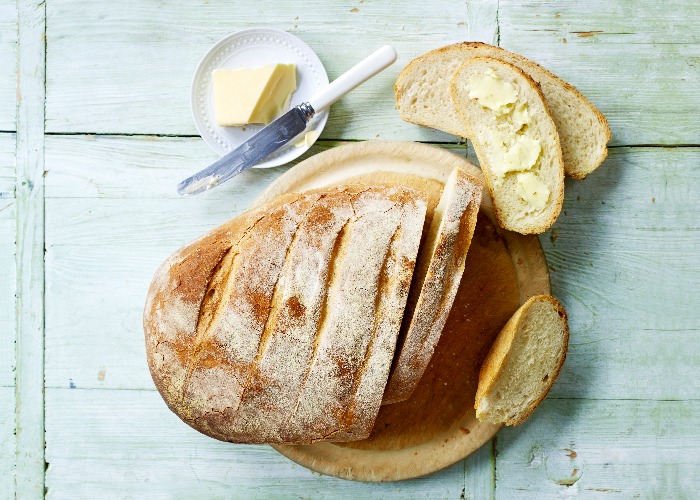
This loaf gets its name from the way it rises and blooms like a flower in the oven. It’s vital to knead the dough vigorously to develop the gluten and give it stretchiness, and to knock back and shape the loaf well. All this strengthens the structure so the dough can rise upwards without a tin.
In addition to the preparation time, you will also need to allow at least an hour for both the first and second prove, where the dough is left to rise.
Ingredients
- 500 g strong white bread flour, plus extra for dusting
- 10 g salt
- 7 g fast-action dried or quick yeast
- 40 ml olive oil, plus extra for oiling
- 17.6 oz strong white bread flour, plus extra for dusting
- 0.4 oz salt
- 0.2 oz fast-action dried or quick yeast
- 1.4 fl oz olive oil, plus extra for oiling
- 17.6 oz strong white bread flour, plus extra for dusting
- 0.4 oz salt
- 0.2 oz fast-action dried or quick yeast
- 0.2 cup olive oil, plus extra for oiling
Details
- Cuisine: British
- Recipe Type: Bread
- Difficulty: Medium
- Preparation Time: 30 mins
- Cooking Time: 40 mins
- Serves: 6
Step-by-step
Making and kneeding the dough
- Tip the flour into a large mixing bowl. Add the salt to one side of the bowl and the yeast to the other, pour in the oil and 240ml cool water and use the fingers of one hand to mix together. Use a clawing action to stir the water into the dry ingredients, so you gather in all the flour.
- Once you’ve got going, add another 80ml water, a little at a time, until you have a soft, sticky (but not soggy) dough and you’ve picked up all the flour from the sides of the bowl. You may not need to add all the water; it will depend on the absorbency of the flour you’re using. Bear in mind that the dough will become less sticky as you knead.
- Pour a little oil onto a work surface. I use oil rather than flour to stop the dough sticking to the surface as it keeps the dough soft and does not alter the balance of flour to water. A wetter dough is harder to handle at first, but produces better bread.
- Knead the dough for 5–10 minutes (or longer if you’re a beginner). It will become less sticky and eventually turn into a smooth ball with an elastic texture. The time this takes depends on how vigorous you are with the dough.
- It is ready when it is really stretchy: if you pull a piece of the dough between your fingers you should be able to stretch it to at least 20cm.
Proving and shaping
- Put the dough in a large, lightly oiled bowl. Cover with clingfilm or a tea towel and leave to rise until tripled in size – at least 1 hour, but it can take up to 3 hours depending on the temperature. A slow rise develops a better flavour, so don’t put it in a warm spot. The ambient temperature in most kitchens is between 18°C and 24°C, which is fine.
- Put the risen dough on a lightly floured surface; you now need to knock back the dough. Fold it in on itself several times to push the air out with your knuckles and the heels of your hands until the air is all knocked out and the dough smooth.
- To shape the dough into a bloomer, first flatten it into a rectangle, with a long side facing you. Fold the long side furthest from you into the middle of the rectangle. Then fold the long side closest to you into the middle, on top of the other fold. Turn the loaf over, so you have a smooth top with a seam along the base. Tuck the ends of the loaf under to make a rough oval shape. Rock gently to form the loaf into its bloomer shape.
- The bread is now ready to prove again. This second rise of the shaped loaf is one of the secrets of great bread, enabling the dough to develop even more flavour as the yeast ferments, giving it a lighter texture. Put the loaf on a baking tray (lined with baking parchment if it isn’t non-stick). Put the whole tray inside a large, clean plastic bag, making sure there is plenty of space above the dough so it won’t touch the plastic when it rises. Alternatively, cover loosely with oiled clingfilm. Leave the loaf to prove, or rise again, until doubled in size – about 1 hour.
Baking
- To check when the bread is ready to bake, gently press it with your finger: the dough should spring back. While the bread is proving, preheat your oven to 220°C (428°F, gas mark 7), and put a roasting tray on the bottom shelf to heat up.
- Lightly spray or sprinkle the bread with water. Dust with a handful of flour, smoothing it all over the top of your loaf with the palm of your hand. Be gentle – you don’t want to knock any air out of the loaf.
- Using a sharp knife, make a few diagonal slashes across the top, 2–3cm deep at a 45° angle. The loaf expands on baking, so the slashes open up. If you do not slash the top, cracks will form around the bottom of the crust.
- Just before you put the loaf in the oven, pour about 1 litre of water into the roasting tray on the bottom shelf. This will create steam when the loaf is baking and give it a crisp crust and a slight sheen.
- Put the loaf tray on the middle shelf and bake for 25 minutes. Then lower the oven to 200°C (392°F, gas mark 6), and bake for 10–15 minutes more, until the crust has a good colour.
- Hold the loaf in a tea towel and tap the bottom. If it sounds hollow, it’s ready. Leave to cool completely on a wire rack.
This recipe is courtesy of Waitrose. You'll find even more of their great baking recipes here.
You might also like:
Nadiya Hussain's Wellington sausage rolls
Comments
Be the first to comment
Do you want to comment on this article? You need to be signed in for this feature