Funfetti birthday cake recipe

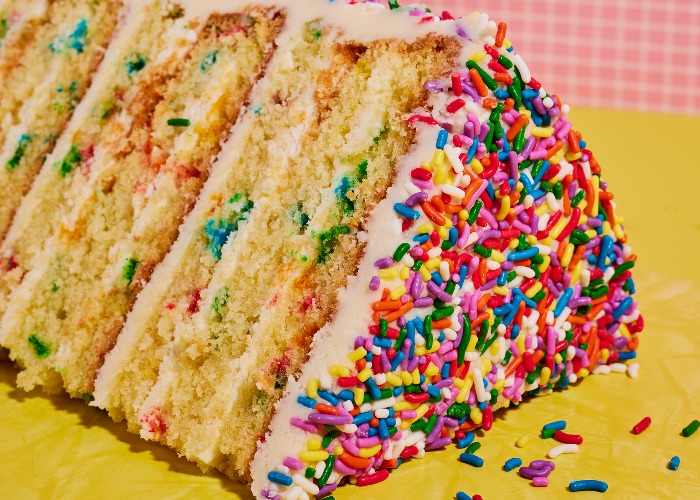
The bake every kid wanted for their birthday, the funfetti cake burst onto the scene in 1989, when American brand Pillsbury developed the original recipe. Suddenly, funfetti was everywhere, becoming a cult classic flavour – and now we're all grown up, just the sight of the sprinkle-laden cake is enough to give us major childhood nostalgia.
This cake, created by Rich Myers of Leeds-based bakery GET BAKED, is a sophisticated (and extra-large) take on the old favourite.
After a sprinkle-gate fiasco put GET BAKED on the map, highlighting that certain sugar sprinkles are banned in the UK and EU, Rich decided to create his own range to rival American-style sprinkles. "They really are the only way to achieve the desired aesthetic here," he says.
Please note: This cake is huge so, while you can cut approximately 10 slices out of it, each slice can be divided into four to create up to 40 portions. It all depends on how much cake you want to eat in one sitting!
You will need three 23 cm (9 in) round baking tins for this recipe.
For US ingredients and measurements, use the drop-down menu and select 'Cups'.
Ingredients
- 1.2 kg margarine
- 1.2 kg caster sugar
- 24 medium eggs
- 2 tsp vanilla extract
- 1.2 kg self-raising flour, sifted
- 1.5 tsp sea salt
- 100 g sprinkles (we used expen$ive sprinkles)
- 2.6 lbs margarine
- 2.6 lbs caster sugar
- 24 medium eggs
- 2 tsp vanilla extract
- 2.6 lbs self-raising flour, sifted
- 1.5 tsp sea salt
- 3.5 oz sprinkles (we used expen$ive sprinkles)
- 2.6 lbs margarine
- 2.6 lbs superfine sugar
- 24 medium eggs
- 2 tsp vanilla extract
- 2.6 lbs self-rising flour, sifted
- 1.5 tsp sea salt
- 3.5 oz sprinkles
- 1 kg unsalted butter, softened
- 1.8 kg icing sugar
- 3 tbsp custard powder
- 3.5 tbsp whole milk
- 2 tsp vanilla extract
- 2.2 lbs unsalted butter, softened
- 4 lbs icing sugar
- 3 tbsp custard powder
- 3.5 tbsp whole milk
- 2 tsp vanilla extract
- 2.2 lbs unsalted butter, softened
- 4 lbs powdered sugar
- 3 tbsp custard powder
- 3.5 tbsp whole milk
- 2 tsp vanilla extract
- 500 g sprinkles (we used expen$ive sprinkles)
- 17.6 oz sprinkles (we used expen$ive sprinkles)
- 17.6 oz sprinkles
Details
- Cuisine: American-inspired
- Recipe Type: Baking
- Difficulty: Hard
- Preparation Time: 120 mins
- Cooking Time: 60 mins
- Serves: 40
Step-by-step
For the funfetti sponge
- Preheat your oven to 160°C/150°C fan/320°F/gas mark 3.
- To make the sponge, cream the margarine and caster sugar in the bowl of a stand mixer (using the paddle attachment) until light and fluffy. This will take at least 5 minutes on a high speed.
- Add the eggs, 5 at a time (if you add them all at once, the mixture will split). Once the mixture looks smooth, add 5 more eggs, then repeat the process until you’ve added all of the eggs.
- Add the vanilla extract with the last 5. When you’re out of eggs, scrape down the bowl and continue to mix for another minute.
- Scrape down the bowl again. Continue to beat for another minute and then add the flour in 3 stages, beating between each addition so that it’s totally incorporated.
- When you’ve added all of the flour, add the salt and the sprinkles and give a final mix using a spatula or wooden spoon.
- Line the base and sides of three 23 cm (9 in) round baking tins, then split the mixture evenly between them.
- Give the tins a firm bang on the workbench to knock out any large air bubbles. This is very important!
- Bake for an hour or until they’re golden brown on top and a skewer comes out totally clean.
- When baked, leave to cool at room temperature inside the tins.
- After about half an hour, remove the cake from the tins and continue to cool at room temperature.
- When they’re totally cool, they’re ready to slice. You’re going to be slicing each sponge into 4 thin layers, so you’ll end up with a total of 12. Slice the domed tops off and cover with cling film (plastic wrap) to use later.
- When you’ve got 12 thin layers of sponge stacked on top of each other with a layer of greaseproof paper between them, wrap the stack in clingfilm and refrigerate. You want the sponge to be cold and firm when you’re assembling the cake.
For the frosting
- While the sponges are firming up, you can make your buttercream. In the bowl of a stand mixer, use the beater attachment to cream the butter on a high speed for at least 5 minutes, or until the butter is very pale. It should go from being yellow to almost white.
- Add the icing (powdered) sugar in stages and beat on a high speed for at least a minute between each sugar addition.
- Add the custard powder, vanilla extract and milk in with the last load of sugar and continue to beat for at least another 10 minutes. This seems like a long time, but it’s essential if you want to achieve a really smooth buttercream.
To finish
- By now, your sponges should be nice and firm and you’re ready to assemble your cake. When the buttercream is ready, place a 28 cm (11 in) cake drum on top of your cake turntable (with a damp cloth underneath to stop it sliding) and place the first layer of sponge into the middle of the drum. It’s very likely that you’ll have some layers that are thicker than others, and I’d recommend using the thicker ones at the bottom of the cake. Think of them like foundations for building your house.
- I would recommend using a palette knife to apply the buttercream. Smear a thick layer of buttercream on top of your first layer of sponge, then repeat the process until you’ve reached the top. Stop every couple of layers to make sure that your cake is straight – you can do this by eye, or by using a spirit level. I’d recommend using a spirit level; it might seem a bit over the top, but the last thing you want is a 12-layer cake that looks like it is on the verge of collapse.
- Once assembled, it’s time to apply the crumb coat. This is a very thin layer of buttercream that goes all over your cake to lock in the crumbs and stop them from going into your buttercream when you coat the outside of the cake. If you don’t apply one, it’s not the end of the world, but you might find bits of sponge make their way into your buttercream. This can spoil the appearance and, more importantly, the texture. It doesn’t need to look neat, it just needs to be smooth.
- When applied, place the cake into the fridge again to set.
- Once set, you can apply the rest of the buttercream all over your cake. Use your palette knife to smear the buttercream around the cake, removing the excess in the process. Obviously, you can reuse the excess because there will be no crumbs in it.
- Repeat the process until your cake is covered and there are no uneven, buttercream-lacking crevices.
- When your cake is covered, immediately coat the whole thing in expen$ive sprinkles. It’s important that you apply the sprinkles before the buttercream has set too firmly, or the sprinkles won’t stick properly. There’s not really a way of doing this that won’t result in sprinkles going all over the worktop, so just make sure it’s clean so any stragglers can be collected and reapplied to the cake. When the cake is sufficiently covered, you’re done.
- Put the cake in the fridge for at least 30 minutes before slicing, just to ensure that the buttercream has set. In the unlikely event that you’ve got leftover cake, it’ll keep perfectly fine in a sealed container for 3 days, or in the freezer for up to a month.
Recipe extracted from GET BAKED: Sensational cakes, bakes & desserts by Rich Myers. (RRP £14.99, hardback). Images © Ellis Parrinder. White Lion Publishing.
You might also like:
Mary Berry's carrot and walnut cake with cream cheese icing
Comments
Be the first to comment
Do you want to comment on this article? You need to be signed in for this feature