Easy sourdough loaf recipe

Welcome to my master recipe. This is the standard recipe that I use every week to make sourdough loaves for my household.
The key to my process is simplicity, not having to plan your life around the dough and being able to fit making sourdough into your home and family life.
Click here for a step-by-step guide to making a sourdough starter, plus tips for looking after it.
Ingredients
- 500 g strong white bread flour
- 7 g salt
- 50 g active starter
- 350 ml water
- 17.6 oz strong white bread flour
- 0.2 oz salt
- 1.8 oz active starter
- 12.3 fl oz water
- 17.6 oz strong white bread flour
- 0.2 oz salt
- 1.8 oz active starter
- 1.5 cups water
Details
- Cuisine: British
- Recipe Type: Bread
- Difficulty: Easy
- Preparation Time: 30 mins
- Cooking Time: 50 mins
- Serves: 6
Step-by-step
- In the late afternoon or early evening, mix all of the ingredients together in your bowl to make a rough dough, with no dry flour showing. Cover the bowl with a shower cap or cover, and leave it for an hour or so on the kitchen counter. Return the rest of your starter to the fridge until next time, with the lid firmly fitted.
- After an hour or so, perform the first set of pulls and folds on the dough to build up its structure. Pick up a handful of dough from one side of the bowl, using your thumb and two forefingers to grab a portion, lift it, stretch it and fold it over the rest of the dough to the other side of the bowl. Turn the bowl a few degrees and repeat the process – lift and fold, turn the bowl, lift and fold, turn the bowl – and continue until the dough comes together into a smooth-ish ball. Then stop. Cover the bowl again and leave it out on the kitchen counter. You can now leave the bowl again for an hour, or half an hour, whatever works for you.
- Over the next few hours, at intervals that suit you, perform three more sets of the lifting and folding action, just enough to bring the dough into a ball; this is the dough telling you when it is time to stop. After each set, cover the bowl and leave it on the counter doing the final set before going to bed.
- Leave the covered bowl on the counter overnight to prove. I typically let my dough prove, untouched, for eight to 10 hours at temperatures of 18-20°C. If it is colder where you are it may need longer; if it’s warmer, you will need to make amendments to the dough at the start of the process.
- Next morning you should have a bowl full of grown dough, look for it to double in size before moving to the next stage; to place the dough into a banneton (bread proving basket), do a series of lifts and folds on the dough, just once around the bowl, to bring it into a firm ball again, then lift it into your banneton, smooth side down. Cover the banneton with the same cover that you previously used for the dough, and place it in the fridge for a minimum of three hours and up to a maximum of 24, to allow the dough to firm up and develop flavour.
- When you are ready to bake, preheat the oven to 220°C/fan 200°C/425°F/gas mark 7. Have an enamel roaster or pan of your choice ready, plus good-quality parchment paper.
- Remove the cover from the banneton, place your parchment paper over the top of it, place the pan upside down over the top of them both. With one hand under the banneton and one hand on top of the pan, turn it all over together to turn the dough out and into the pan.
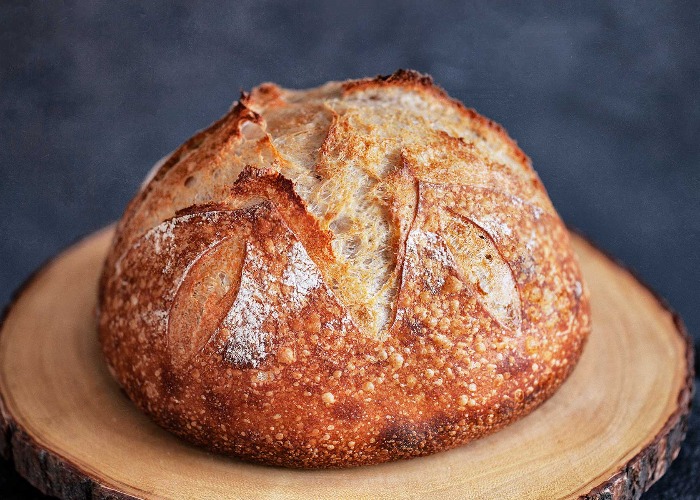
- With a lame or a clean razor blade, score the dome of the dough cleanly and firmly, at a depth of 0.5 to 1.0 cm.
- Bake for 50 minutes, keeping the lid on for the entire time.
You might also like:
Comments
Be the first to comment
Do you want to comment on this article? You need to be signed in for this feature