How to grow your own herbal tea

Is it time to throw out your teabags and start growing your own?
Before PG Tips and a long way before builder’s tea, man has been brewing teas or ‘tisanes’ from leaves, flowers and berries. Thought to come from the French ‘thé’ for ‘tea’, and 'sans' for ‘without’ (i.e. without caffeine), these infusions shun synthetic fillers for fresh ingredients.
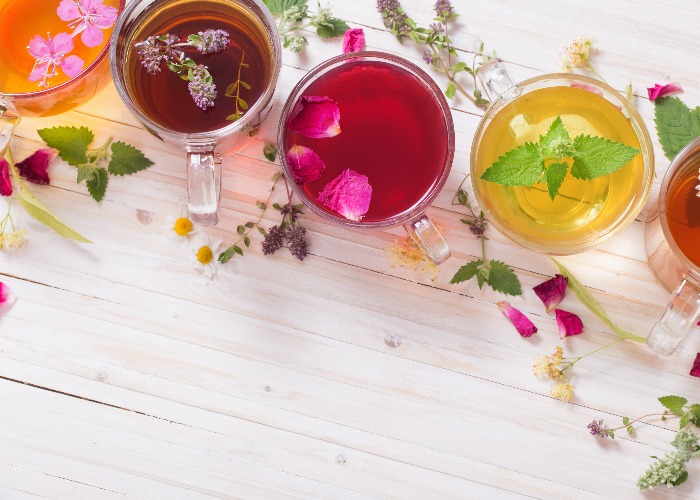
Homegrown teas retain more flavours, aromas and nutrients than you’ll find in the bagged versions, and it's surprisingly simple to make your own by growing the herbs in pots or raised beds. Here are five simple brews to try.
Mint
Grow: Mint is one of the easiest herbs to grow. In fact, you might have a problem stopping it: this greedy plant needs to be containerized to prevent it taking over your garden. Plant between March and May, choosing a very large pot or raised bed, and plunging young plants into a pre-dug hole as deep as the root ball. Mint likes moist, partially shady conditions so never let the plants dry out. Ditch garden mint for perkier varieties such as peppermint, orange, chocolate, Moroccan and pineapple but ensure you plant separately or they can end up all tasting the same eventually.
Gather: Give plants a chance to establish before harvesting. They will put on fresh growth from May to October, so this is the ideal time to pick. Harvest little and often to keep them compact and pinch out flowering buds in summer to extend the harvest. Rotate between several plants so you don’t exhaust them.
Gulp: One large handful is perfect for a cuppa – and is fabulous for digestion. Steep alone or combine with lemon balm, lemon thyme or rosemary, and sweeten with honey. It’s possible to ‘burn’ leaves with boiling water so let the water sit before using. Chill for a refreshing iced tea.
 Pixabay
Chamomile
Grow: This ground-hugging plant spreads slowly and can be grown from seed, cuttings or by layering. The latter is when you fasten a shoot from an established plant onto the ground to produce roots. Alternatively, sow in May onto the surface of peat-free compost and cover with vermiculite (mineral chips). Place into a heated propagator or on a sunny windowsill and when large enough to handle, transfer to bigger pots. When all chance of frost has passed, plant out into a sunny position. Water regularly and clip plants as they grow to shape.
Gather: The golden, daisy-like blooms can be harvested as they open in July. Gathered on a sunny morning, the plant’s oils will be at their most vibrant. Freeze as soon as possible in zip-lock bags or dry for a more intense flavour by hanging bunches in a cool room or spreading flowers out for one week to crisp.
Gulp: Crush and steep the buds in hot water. Rich in the natural tranquillizer tryptophan, they make a wonderful bedtime brew.
 Pixabay
Lemon balm
Grow: Grown from seed in March to May, this herb is unfussy about its position and can tolerate shade. Like mint, however, it can be a bit of a thug so is best planted in a container, or plunged into the ground pot-and-all. The seeds can take up to three weeks to germinate, so be patient. Cut back after flowering to encourage new growth.
Gather: Harvest from July to September and use fresh or dried. If drying, cut two thirds of the way down the stem and hang for up to three weeks. For best results, do this before the plant flowers.
Gulp: Use one tablespoon of fresh leaves, or one teaspoon of dried, for a pot. It's thought to aid digestion, soothe headaches and reduce stress.
 Shutterstock
Borage
Grow: Borage can be sown direct onto a sunny spot in late spring and raked in. It will happily self-seed (i.e. create more plants without any help from you), so collect the seeds yourself and you can decide where you’d like your next plant to grow.
Gather: Harvest young leaves in June or July. Dried leaves don’t retain the same flavour as fresh, so use straight away or freeze.
Gulp: Growing from scratch allows you to enjoy something you can’t buy in the shops. Borage is one of these crops. A small handful of the furry leaves imparts a gentle hint of cucumber to iced tea. It can even be used as a gargle for sore throats.
 Pixabay
Raspberry leaf
Grow: We love to eat the fruits, but raspberry leaves can also be used to make tea. Buy bare root canes between November and March and insert into moisture retentive, fertile ground. They transplant easily and will send out fresh shoots in spring. They can even be grown in containers, but ensure pot-grown fruits are well fed and watered.
Gather: Harvest in spring before flowering. Use fresh in the summer and dry for winter, either on a sunny windowsill or on a very low heat in the oven.
Gulp: Though the tea is not raspberry flavoured, the leaves produce an infusion similar to black tea. Steep in cold water first to reduce the bitter tannins, and serve with honey or milk.
 Shutterstock
Note: always check that you know exactly which plants you are harvesting. Avoid raspberry leaf tea if you are pregnant, as it’s thought to have a relaxing effect on the uterus.
You might also like:
How to make an English cream tea
Comments
Be the first to comment
Do you want to comment on this article? You need to be signed in for this feature