How to master the art of dum cooking
Diya Gupta reveals her step by step guide to dum cooking.
“Dum” literally means “taking in air” in Hindi. Dum cooking entered India by way of Persia some 200 years ago, brought into the country by Muslim settlers.
This culinary style allows for meat, coated with fresh spices and herbs, to slow cook in its own juices, retaining moisture and losing none of its succulent flavour and nutrients.
The story goes that dum cooking was first used in India to provide a constant supply of food for the working populace in the late 1700s, employed in building the magnificent edifice, the Bara Imambara, in Lucknow in northern India.
Enormous containers were filled with rice, meat, vegetables and spices, and their lids sealed with dough. Hot charcoal was placed on top and fires lit underneath, while the slow cooking ensured that food was available at all times.
This style of preparing food immediately curried (forgive the pun!) favour with the ruler Nawab Asaf-ud-Daulah. Enticed by its aroma and taste, he introduced dum cooking into the royal household.
And India has never looked back: from ramshackle roadside eateries to fashionable urban restaurants, the delectable art of dum cooking dominates the Indian palate.
But how do I dum?
You don’t need charcoal, dough or a gourmet king to bring this cooking technique into the kitchen. Dum cooking is very adaptable – all you’ll need is your trusty hob and oven.
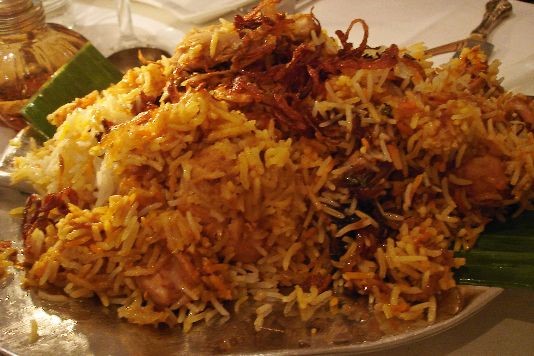
I’ve chosen one of my favourite meals to illustrate how the technique works – the delicious chicken biryani, cooked on the bone, with potatoes and rice. This recipe serves four people.
You’ll need…
- 1 kg chicken drumsticks and thighs (take the skin off, so that the spices can be absorbed into the chicken)
- 500 gm baking potatoes, peeled and quartered
- 3 onions, peeled and finely sliced
- 100 gm natural, low-fat yogurt
- 3 tablespoons of garlic*
- 3 tablespoons of ginger*
- Salt if needed
- 3-4 tablespoons of milk
- 3 bay leaves
- Whole garam masala (4 cardamom pods, 5 cloves and 2 cinnamon sticks)
- 1 teaspoon coriander powder
- 1 teaspoon chilli powder
- 1 teaspoon garam masala
- 4 tablespoons biryani powder**
- 4 tablespoons olive oil
- 2-3 tablespoons ghee (clarified butter)
- 500 gm basmati rice, rinsed a couple of times (don’t compromise on the quality of the rice! It makes or breaks the dish)
- 2-3 drops yellow food colouring (optional)
Cheats!
* You can take fresh garlic and ginger pieces and mulsh them into a paste in a food processor. I just prefer to use ready-made ginger and garlic paste by Rajah, available in the world food section of any large supermarket or in an Asian store.
** Traditionally, biryani powder is sold in little paper bags at the local grocery store in India. I find that the Sindhi Biryani Mix by Shan works just as well. Again, look in the world food section of supermarkets or in an Asian store.
Getting ready to dum….
The chicken
1. Heat the oil in a deep cooking pot and fry the onions until they start turning brown.
2. Add the chicken, garam masala, chilli powder, coriander powder, bay leaves, ginger and garlic paste, Shan’s Sindhi Biryani Mix and a pinch of salt if needed.
3. Fry the chicken in these spices for about 15 minutes on medium heat.
4. Coat the chicken with the yogurt and keep turning the chicken so that it doesn’t stick to the bottom of the pot.
5. Add a little water if necessary and cook for half an hour or until the chicken is tender. The chicken should be quite dry.
The potatoes
6. In a separate pan, fry the quartered potatoes until they turn golden. Keep aside.
The rice
7. In a separate saucepan, pour in the rice with a pinch of salt, along with the cardamom pods, cloves and cinnamon sticks.
8. Add water (about double the amount of rice), bring to a boil and cook for 8 minutes.
9. Drain the water from the rice. The rice should still be a little firm. Take out a grain or two between your thumb and forefinger, and check whether it is still brittle.
10. If you don’t want to be crunching on whole spices while eating, take out the cardamom pods, cloves and cinnamon sticks.
And finally, dum time…
1. Pre-heat the oven to 180°C.
2. Coat the bottom and sides of a large (and deep!) oven dish generously with oil. The dish should have a lid.
3. Add a layer of rice, followed by a layer of chicken and potatoes, and then by another layer of rice.
4. Take two drops of the yellow food colouring and stir it into the milk. (Be careful not to spill – you’ll end up with an annoyingly stubborn yellow stain!)
5. Make small holes with the end of a fork into the layered rice and chicken and pour the coloured milk into them.
6. Heat the clarified butter (ghee) and drizzle on top.
7. Stick the dish with the lid on into the oven for 30 minutes.
8. Drink in the aroma and then enjoy a meal fit for a king!
A little extra…
You can enjoy chicken biryani with some raita as an accompaniment. Finely chop an onion and 3 or 4 birds-eye green chillies, and mix into 100 gm of yogurt. Add a pinch of salt. Your raita is ready!
With tips from Rashmi Deb, biryani chef extraordinaire.
Also worth your attention:
The secret to cooking perfect rice
Comments
Be the first to comment
Do you want to comment on this article? You need to be signed in for this feature